Apr 25, 2012

Week 17 - Caprese Salad with Balsamic Pearls


This week is definitely a redo. The only reason for this is that I attempted a substitution on an ingredient that I had no idea about. I've never gelled anything and there's like no information at the store on the differences between gelling agents. Needless to say, I bought the wrong one. So this week's post is not complete until I redo the balsamic pearls.


So Caprese Salad..... not really a salad...not really that good. I have to say it's kind of addicting though. I wasn't a fan of the basil at first, so I tried just tomato and mozzarella. Pretty good. So I tried it with basil again...and again and again. I ate alot of this stuff. Not my favorite. I'm sure that adding the balsamic pearls will be better for the redo.

Caprese Salad with Balsamic Pearls
Ingredients:
Small tomatoes (cherry, grape, smaller than roma)
Mozzarella pearls (or fresh mozzarella cut into small pieces)
Fresh Basil
Balsamic Vinegar (not vinaigrette)
2oz Pack of Agar Agar (do not substitute)
1 cup Flavorless oil

Directions:
Put the oil into a clear glass container and place into the freezer for 30 minutes. Combine balsamic vinegar and agar agar into a small pot and bring to a boil. Stir well and empty into a heat-safe bowl. Using a dropper/syringe/child's medicine dropper, slowly drip the vinegar into the cold oil and pearls will form. When about 1/8 - 1/4 inch of pearls have been made, spoon them out into a glass of cold water. Strain the pearls. Repeat until the balsamic mixture has been pearlized.

For the salad portion, halve the tomatoes, place a small piece of basil and 4-5 mozzarella pearls on the tomato. Top with the balsamic caviar pearls and enjoy. Or not enjoy...it's up to you.


Apr 20, 2012

Week 16 Crab Cakes


Unbelievably spontaneous meal tonight. With less than an hour remaining at work, a co-worker asked if I've ever had the crab cakes from Whole Foods Market. I hadn't so I engaged in conversation. The way they were talked up was great. It got me craving crab cakes. I traveled to San Francisco last year and had some uber-fresh crab cakes. Those were the absolute best ones I've ever had. These below, come in at a very close second.


While easy to make, I became a little anxious and decided to pull the mixture out of the refrigerator early. Nothing wrong with that other than texture.

Basic recipe for Crab Cakes:
Ingredients:
1 egg
3 Tbsp lemon juice (1 large lemon)
3 Tbsp olive oil (or other high quality non-flavored oil)
1/2 cup mayonnaise
2 tsp Old Bay seafood seasoning
1 tsp ginger powder
1/4 cup panko bread crumbs
1 tsp hot sauce (Sriracha or Tabasco)
1 lb real crab meat (fresh=best, avoid imitation as it won't mix well)
flour for dusting the mixture
your favorite frying oil blend (2:1 vegetable:olive is my preference)

Directions:
In a large bowl, mix the ingredients in order. Order actually doesn't matter other than crab being last. It was just easy to mix the liquids first. After mixing the ingredients, spread the mixture around the bowl and refrigerate for 30-60 minutes. The reason for spreading the mixture is to increase surface area so it cools quicker. If it's in a lump in the bowl, you'll have to chill longer.

After it's chilled, use a large dinner spoon to scoop a glob of the mix and dust with the flour. Using your hands, form into a small patty and fry 2-3 minutes per side or until browned on each side. Serve on top of a fresh spring salad mix with some spicy mayonnaise although you won't even need dressing as this is not a dry crab cake.

Apr 13, 2012

Week 15 - Chocolate Truffles

Week 15 - Chocolate Truffles

Before I get started, I haven't broken my 2012 new years resolution. Last week I did make pirouettes. At least the stuff that I ended up tasted pirouette-like.... Either way, I attempted to make some stuff and the taste was there but the appearance was not. I took some pictures and just felt it wasnt blog worthy. I'm gonna have to redo it and will post it soon as Week 14-Pirouettes.

So now begins week 15's blog redemption. I needed to save last week's failure by making something amazing. To gain some brownie points (pun absolutely intended) with the wife, I decided to make chocoloate, mixed with coffee, dipped in chocolate and drizzled in chocolate. Pretty easy recipe I think. Just make a chocolate ganache which is whipping cream, butter, corn syrup and seasonings which are cooked and poured over chopped chocolate. After 3 sets of chilling and stirring the velvety mix, the chocolate becomes dry and firm.


The next step would be to form some chocolate balls using a couple cold spoons or whatever other device you have. After another quick chill, the globs are better formed by hand and dipped in fresh dark chocolate.


Powder coated in cocoa powder

Left alone...

Insides tasted perfect.

Mar 29, 2012

Week 13 - Tiramisu


If something doesn't turn out the way you wanted, can you still call it a success? When I set out to make tiramisu, I imagined a moist, cakelike consistancy. What was produced was a cakeytop and mushy bottom and what I would call...mess. Either way, this had a real good classic tiramisu taste. I made strong espresso and brandy mix and omitted some sugar so it wasn't so "American-ized". Since this is only a partial success, I will be experimenting with the recipe to produce a better dessert.

The recipe for the tiramisu was a combination of Giada's food network recipe and the recipe that was on the back of the lady finger cakes plus random experimentation by myself.

Tiramisu Recipe
Ingredients:
6 egg yolks
4 tablespoons sugar
16 ounces Marscapone cheese (room temperature)
2 cups espresso (2-four oz pulls or very strong, non-bitter coffee)
1/2 oz Brandy (I just eyeballed 1/2 shotglass)
2 packages of Ladyfingers (get in the bakery, the firmer/thicker the better)
dutch process cocoa for garnish

In a mixer, beat together the egg yolks and sugar close to 5 minutes. Continue beating (perhaps with a different mixer attachment) and add the marscapone cheese, and a couple teaspoons of the espresso. Mix until smooth.

Using a large shallow dish mix the remaining espresso and brandy and let cool. Get this dish very shallow because the ladyfingers will soak very quickly. Soak the ladyfingers for a second or two. Stop soaking before you think it will be saturated. Put the soaked ladyfingers in a 9x9 dish. Coat this bottom layer with half of the marscapone mixture. Soak another set of ladyfingers and put on the cheese mixture. Put the remaining cheese on top.

Chill for at least 2 hours. Garnish with cocoa powder or finely grated chocolate!

Mar 21, 2012

Week 12 - Soft Pretzels


Apparently I've got a thing for different types of flour. In the pantry I have an all purpose flours, started a natural unbleached whole grain flour, and now for this recipe I've gotten myself into bread flour. After reading a couple recipes, all purpose flour has a lower gluten content than bread flour. Apparently, the higher the gluten, the stretchier the dough. So because pretzels need to be soft and chewy rather than light and fluffy, bread dough needed to be purchased.

I really can't remember the last time I had a really good pretzel. Maybe the pretzel I ate last wasn't even worth remembering... maybe I don't even like pretzels... who knows? Either way, this week's recipe is a soft NY style pretzel.

Why hello there...

This is what yeast looks like straight out of the package.. no smell until the proofing begins.

Such a chewy result. mmmmm....

Can I eat this picture?

The recipe is pretty simple. I'm writing this from memory.

Ingredients
Dough:
1 package of active dry yeast
1 cup warm-hot water
1/4 cup honey
1 tsp salt
3 cups bread flour
small drizzle of olive oil
pretzel/coarse/sea/margarita salt

Baking Soda Solution:
6 cups water
3 Tbsp baking soda

Directions:
Start by proofing the yeast. This means add the package of yeast into the 1 cup water with 1 tsp sugar and let sit for about 10 minutes. It will either smell like bread or beer...just depends on what you are craving. Add in the honey when it's done proofing. Next, combine all the dry ingredients and slowly add this to the water. I used a kitchenaid mixer with the dough hook attachment... not sure what I would do without it. Mix the dough well and knead on low for about 5 minutes. Oil a medium sized bowl with olive oil and transfer the dough. Roll the dough around so it gets coated with oil. Cover and let it rise for an hour. When it has doubled in size, literally punch the dough back down and let it rise again for another 30 minutes.

Add the baking soda to the 6 cups of water in a large pan and bring to a boil. Preheat the oven to 450 degrees. Using trial and error for pretzel size, rip pieces of dough off the ball and roll dough until pencil thin. When ripping pieces, I used only my fingers and not my palms, this allowed the size to be consistent and makes a good palm size baked pretzel. Shape the pretzels.

Cook the pretzels in the baking soda water for 30 seconds per side. Then drain and place on a parchment paper lined baking tray. Sprinkle with salt and bake for 12-14 minutes until the tops begin to look brown. Remove from oven and let cool on a wire rack. A quick tip for timing. If they look like they're almost brown but not quite.... I'd take them out. I left some on for 12 minutes until I saw they looked brown, I opened the oven and they cooked a bit more than I would have liked. Not burned, but just darker than what I like.


Imagine about 5-6 more pretzels on top of this pile. My wife and I sort of attacked them before they had the chance to cool.

Mar 15, 2012

Week 11 - Copycat Ritz Crackers

I guess I should admit right from the start that Ritz crackers taste WAY BETTER than this version. They have similar tastes, but whatever Ritz does....it makes them much fluffier/crunchier. Mine were more of a thin crunchy buttermilk biscuit. Either way, these crackers tasted just fine.


For the cracker dough, it's a mixture of all purpose flour, baking powder, salt, butter, vegetable oil, and water. that's about it. I mixed all the dry ingredients in my Kitchen aid mixer and slowly added cold unsalted butter to the mix, then oil, then water.


Rolled this dough onto a surface dusted with whole wheat flour to about 1/8inch thick. I would have really loved a ravioli or other squiggly pasta cutter for this but I ended up using a regular pizza cutter.


Poking holes in the centers using a fork apparently helps the crackers bake properly. Why? science...i guess...

Bake these bad boys for about 10 minutes or until they start browning at 400 degrees. Be careful when doing this at night....smoke alarms may wake up children....


Brush with salted butter and let cool. MMMMMM......


Mar 6, 2012

Week 10 - Homemade Fish Sticks and Spicy Tartar Sauce


I used to love fish sticks as a kid. I don't know why I say "used to" cause I still love fish sticks. After deliberating on an easy yet tasty small meal this week, I settled on this.

These were surprisingly easy to make. First was the selection of a fresh white fish. There's no specific fish that's better than the other, but I used Cod because the others (trout, halibut) were too thin. This fish was about a half inch thick throughout the fillet.

((I want to apologize ahead of time for any randomness in this blog. I'm eating the fish sticks now and am getting very distra...))

Starting off was the slicing of the fish, I just cut them into roughly 3 inch sticks cause that's what I'm used to buying. Roll the sticks in flour, dip in egg, roll in crumb mix.


For my mix I decided to go with a blend of corn meal, garlic powder, salt, pepper, red pepper flakes, and  and since I don't have any Panko mix, I crushed up some veggie chips and used that as well to give it some crunch. ((Oh man...I ate all the fish sticks...sad))


I bought some tartar sauce when I got my fish just in case the homemade tartar sauce flopped. I didn't even need to think about opening it! Using mayonnaise, Worcestershire sauce, sriracha sauce (rooster sauce), lemon juice and fresh chopped parsley I mixed up a very spicy-sour tartar sauce. If this stuff didn't need to be refrigerated, I would literally carry it around in my pocket just in case I ever ran into a fish on the street that I wanted to eat.


Homemade Fish Sticks and Spicy Tartar Sauce
adapted from www.acozykitchen.com
Fish Sticks:
4 thick filets of a white fish (cod, catfish, trout, halibut, tilapia...)
all purpose flour
2 eggs
corn meal
garlic powder
salt
pepper
red pepper flakes
Panko mix or other crunchy frying mix
vegetable oil

Wash and dry the fish. Slice into 3-4 inch strips that are similar to very thick french fries. In a medium shallow dish, place half cup flour. In a small bowl, beat the two eggs. In a medium plate, combine corn meal, garlic, salt, pepper, red pepper flakes, and panko mix. Roll the sticks in flour and pat off any excess. Dip the fish in the egg and roll in the frying mix. Fry all the battered fish sticks in the vegetable oil for a couple minutes per side.

Spicy-Sour Tartar Sauce
1/2 cup mayonnaise
1 tsp Worcestershire sauce
1 tsp Sriracha
1 tbsp lemon juice
1 tbsp lime juice
1 tbsp finely chopped parsley

Although this is probably not a "true" tartar sauce, it tastes close enough to it without the little crunchy bits in it. Just mix everything together and you're good to go.

Feb 28, 2012

Week 9 - Cheese Stuffed Tortellini


Well that was messy... why isn't there a button for that? This week I attempted to make my own pasta. I'm kind of torn on if i succeeded or not. I think that it was part success and part WHOAH THE EGGS ARE GETTING ALL OVER THE PLACE!! Either way, I was able to salvage most of the fresh pasta and it didn't kill me to eat it.

This recipe was kind of random, I looked up what things are stuffed in a tortellini and found a recipe that involved chopped spinach and ricotta and Parmesan cheeses. I mixed the cheeses and spinach but felt it needed more flavor. So I added a bit of a garlic/basil pesto sauce to the mix and it tasted much better.

If you attempt to make your own pasta, it's basically a pile of flour with a well dug in the center. What I need to do next time is not make it such a deep pool,,, but rather a wide and shallow pool. So in my first attempt, the egg rolled off the flour mountain like lava and went everywhere. I had to grab handfuls of flour and make barriers to stop the flood. Thus, the lack of pictures....

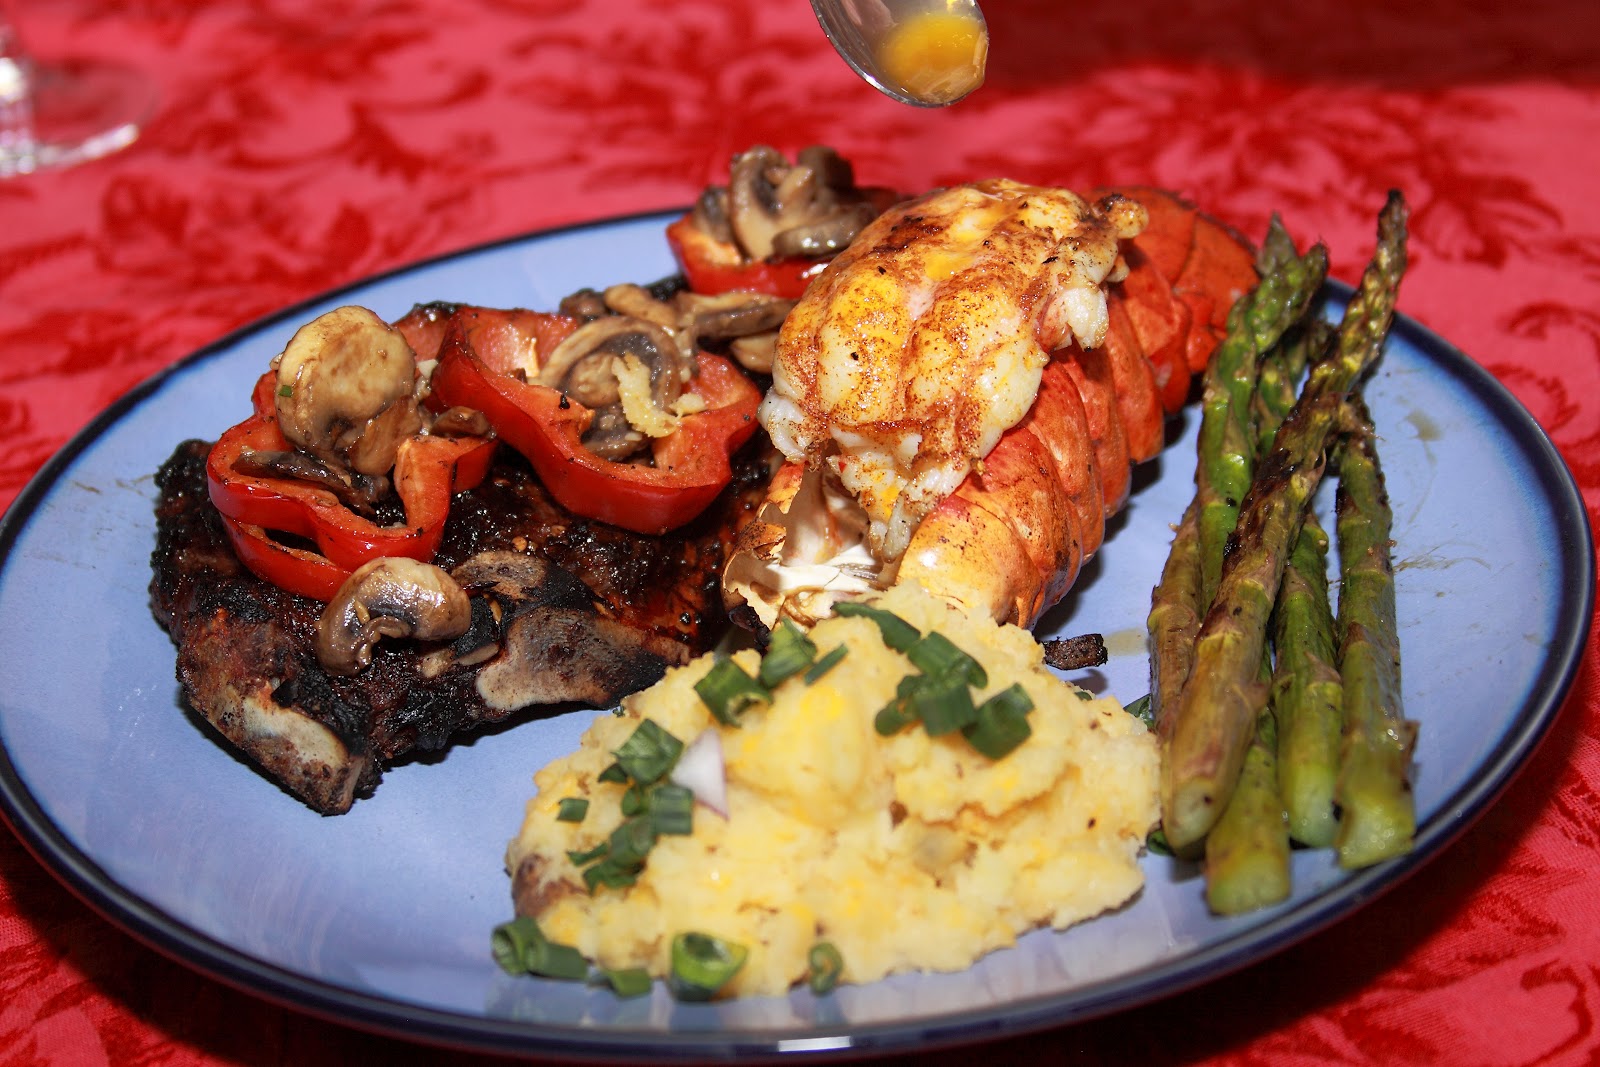
Final dish with grape tomatoes, black olives, Italian seasonings and olive oil.


Cheese Stuffed Tortellini
-Adapted from Alton Brown's recipe

Prep Time: 25 minutes
Cook Time: 5 minutes
Servings: 4-8 depending on amount of pasta

Ingredients:
·         ¾ cup ricotta cheese
·         ¼ cup grated Parmesan cheese
·          ½ cup fresh chopped spinach
·         1 egg
·         ¼ tsp fresh ground black pepper
·         1 pinch grated nutmeg
·         1 tsp basil pesto (basil, parsley, garlic, olive oil)
·         Fresh Pasta (Recipe below)
·         1 egg mixed with ½ teaspoon water
·         1/8 cup fresh chopped parsley
·         ¼ cup black olives (halved)
·         ½ cup grape/cherry tomatoes
·         olive oil
·         Italian seasoning (dry basil, parsley…)

Directions:
In a medium bowl, combine the ricotta, Parmesan, spinach, egg, pepper, nutmeg and pesto.  
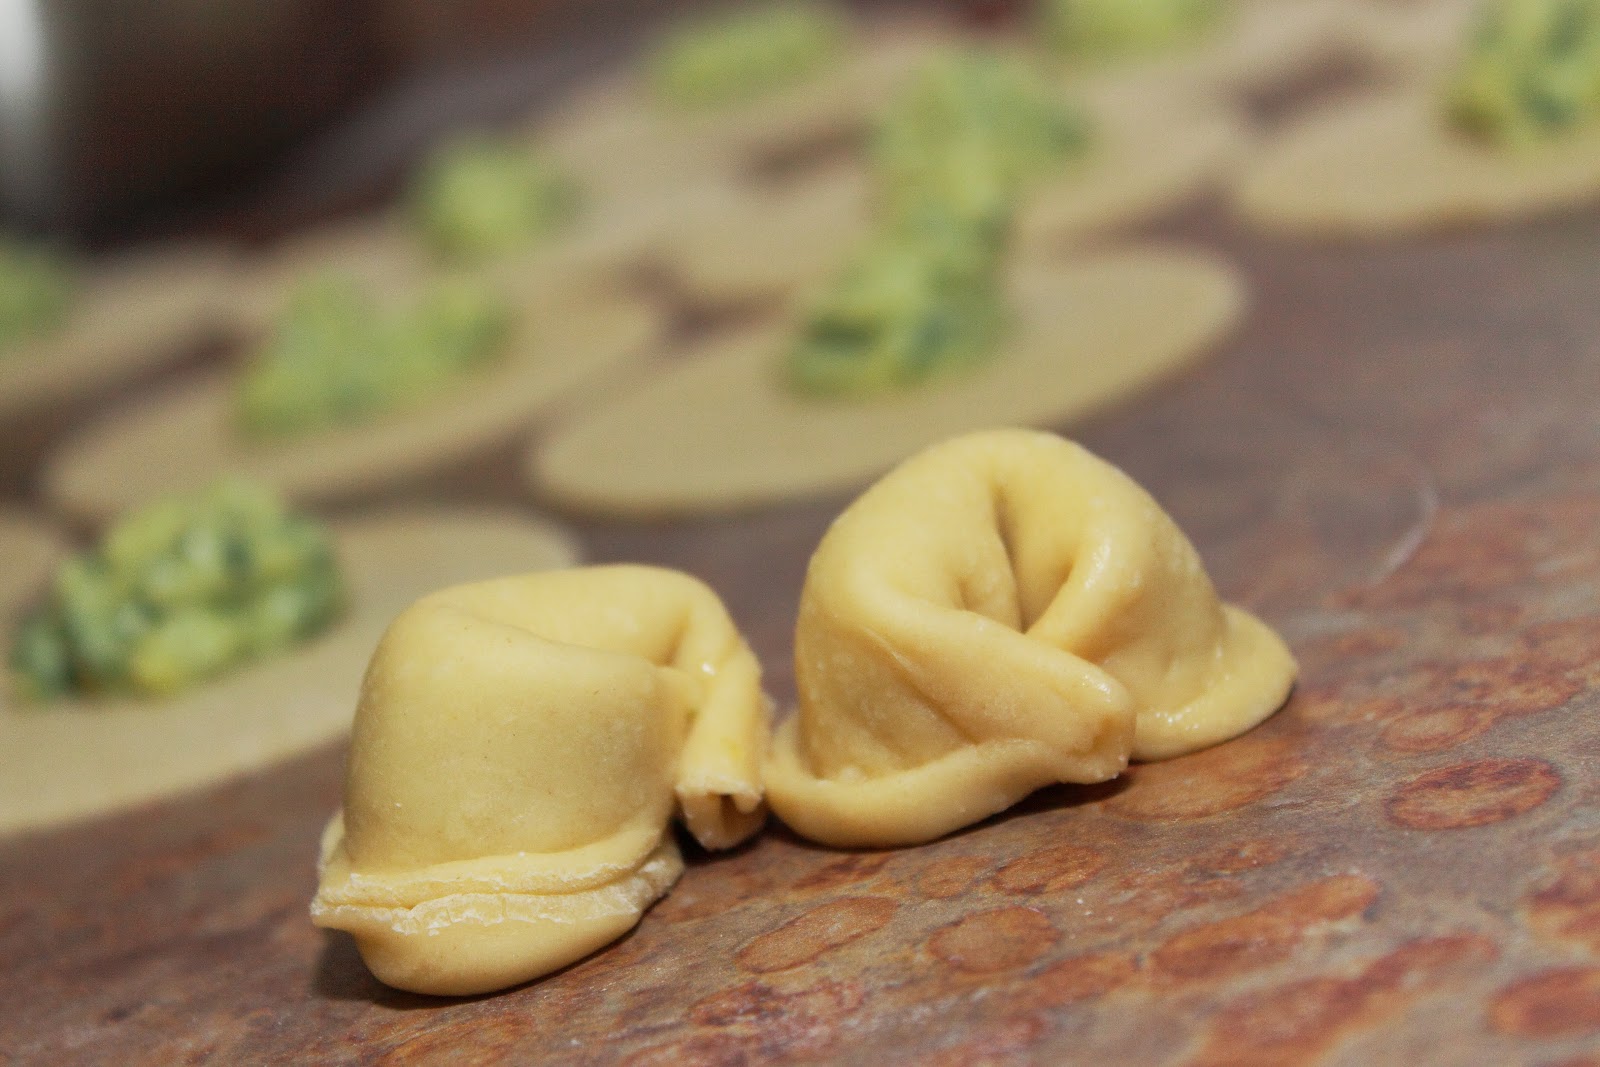
Using the pasta recipe below, roll out the pasta to be as thin as a credit card. Cut out 2-3 inch circles using a cookie cutter. Immediately wrap the ‘scrap’ pasta so it doesn’t dry out. Spoon ¼ - ½ teaspoons of the cheese and spinach mixture into the center of the pasta circles. Using your ring finger, brush the egg wash onto one half of the circle. This will act as glue. Quickly fold the circle in half and crimp the pasta together with your dry fingers. Using your dry fingers, begin to roll the pasta into itself by lifting the center of the pasta circle and curling the edges into the center. Using the same ring finger, brush egg wash onto one edge of the pasta and press the ends together to seal the tortellini. Place the tortellini into rapidly boiling salted water and cook 3-5 minutes. At this point the pasta will float to the surface of the water. Strain all pasta. Toss with olive oil, then parsley and Italian seasonings, then with tomatoes and olives.

Fresh Pasta

Ingredients
·         3 cups flour
·         2 large eggs
·         3 Tbsp water
·         1 tsp olive oil
·         ½ tsp salt

Directions
On a large clean surface, pile the flour. Using dry hands, make a well in the middle of the pile and begin to spread the flour out. The well should be wider than it is deep (3-4 inches wide and 1 inch deep). In a bowl, mix the eggs, water, oil, and salt. Slowly pour the mixture into the well. As the mixture is pouring, use a spoon to begin mixing with the flour closest to the well. This will help ensure the egg mixture does not run over the edges of the well. Continue mixing flour until the dough becomes too stiff to mix by spoon. At this point add flour by hand and knead until no longer sticky. If using a pasta roller, follow the machine instructions to roll pasta. 


Feb 20, 2012

Week 8 - Crème brûlée


There's just something about these bowls that I love. I received these for a Christmas present a few years ago and really love the way they look when all the bowls are stacked. I have used these bowls for every one of my dishes in the past weeks so needless to say, I used them again in this weeks endeavor.

This week, I made something that I have been craving for years..... I can't remember when the last time I had creme brulee was, but when I did it was nothing short of amazing. As an die hard egg fan, this dish really speaks to me. It whispers sweet nothings into my ear... holds me tight... rocks me to sleep... Anyways, this dish really surprised me on how easy it was to make! Although, I'm in the process of making it a challenge for the future (thinking spicy).

The main ingredient in this dish is egg yolk. Crazy eggs never know how to pose for a picture.

Everything is ready to bake.


Then came the FIRE!!!!!


Whoooaaaaahhhhh BABY!!


But what do you do with all the leftover egg whites?? Make white chocolate meringue drops!! duh....


Feb 14, 2012

Week 7 -- NY Strip Steak and Lobster Tail

Week 7 – Valentine’s Day Steak and Lobster
MMMMMMM…. steak and lobster. What a wonderful combination. After a long list of things I could do for Valentine’s day, we ended up settling on an all-out surf and turf. First off… I need to share with you about this one amazing steak that I had once. It was at Charley’s Stake House in Orlando. It was the kind of restaurant where they bring out a selection of steaks to your table and you pick what you want. I chose this New York steak that was like 2 inches thick! It took forever for them to bring out the cooked dish but it was worth it.
Charley’s has a very neat grilling process. First, the steaks are aged and seasoned for a few days in a climate controlled room. Then, with all the fat left on, they sear the steak with a very hot flame on both sides. After a couple minutes searing, they move the meat to a lower heat area and is smoked with applewood. Needless to say, their process is a lot more involved than any normal backyard barbeque so of course it tasted much better. The best part about cooking with the fat on is the flavoring in the fat was absorbed into the meat. When diving into this steak, you just trim the stuff you don’t want.
                I’ve attempted this method a couple of times but it never worked out. I think the reason is that I was using ‘cheap’ meat. This time I went to the butcher and again selected my steaks. I got a pair of NY strips that are roughly 12 oz each and about 1.5 inches thick. Expensive, but worth it!

                For a dry rub, I mixed salt, pepper, dried minced garlic, paprika, brown sugar, and dried crushed red pepper. Most of it was to taste. I tried to follow a recipe but it didn’t smell too great. A little more pepper, garlic and red peppers than suggested fixed that.


                Now I know that steak isn’t new for my cooking résumé, but the lobster sure is. I love food presentation at restaurants so I decided to butterfly. Thanks Google for knowing everything about butterflying a lobster tail.


                Grilled some garlic /red wine asparagus


Combine all this together and BAM! A very delicious meal.


For a quick comparison, this size steak and lobster tail with a side is around $30-35 dollars per plate at Red Lobster. The entire 2-meal cost me only $29. Not bad and very easy to make. 


As an added bonus... I've been a fan of cooking competition TV shows like Chopped and I felt like I should have been filmed during the making of this meal. I was literally running across the house to do prep and outdoor grilling!!